- Get link
- X
- Other Apps
Week 4
[Achievements]
Day 22 -->
Electronic Production:
1. Electronic Components
1. Electronic Components
- 1. Got familiarised with diodes, Leds, Capacitors, Resistors, ICs, Zeners etc. by our instructor
3. Roland's PCB Milling techniques
4. Populating of board
5. Soldering
6. Programming
<-- Week 4
Day 22
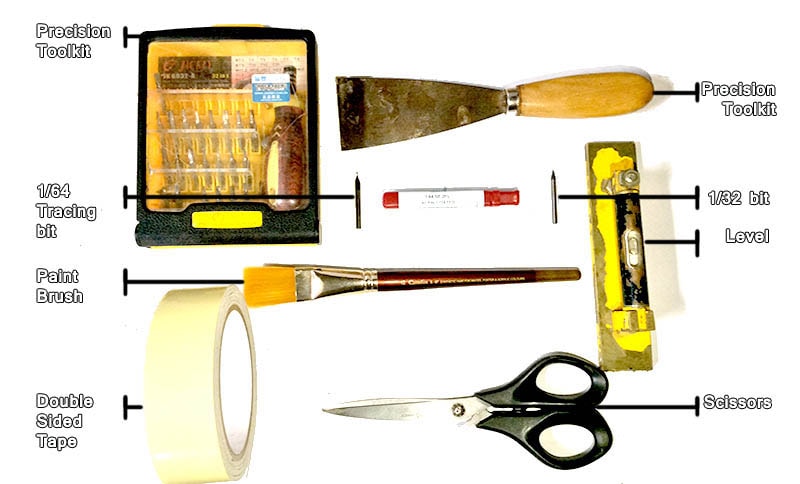
[ Preparing Files ]
Day 23 -->
1. Troubleshooting Laptops of my peers installing Ubuntu
2. Editing my Website

After a very informative Recitation with Dr. Neil, I sat for an hour or two to think of ideas regarding my assignment and how i plan to go about it. Went through softwares suggested by other fabbers like Flatfab and also different types of laser machines like waterjet, iron cutting etc.

EDITING
ORIGINAL FILE IN PHOTOSHOP

EDITING
MODIFYING THE TRACE PNG

EDITING
SHAPING THE CUT FILE

EDITING
ADDING A KEYCHAIN HOLE

EDITING
CLEANING THE PNG

EDITING
FINAL CUT FILE
<-- Day 22
Day 23
[ Setting up Modela ]
Day 24 -->
1. Learnt how to mill using roland modela
2. Tried milling by myself in the presence of our instructor Suhaas and Suyog.
Today, its Vigyan Ashram's holiday as its their Village yatra (journey) where all the people belonging to that village meet each other coming from different places, pray as community and invite others to their home for lunch and dinner. So I was invited to one of our instructors place which had a very beautiful and heritage architecture, ate very tradional Vegetarian food. On this occasion they also have faire as community.

SUDO FAB
ENTERING PASSWORD
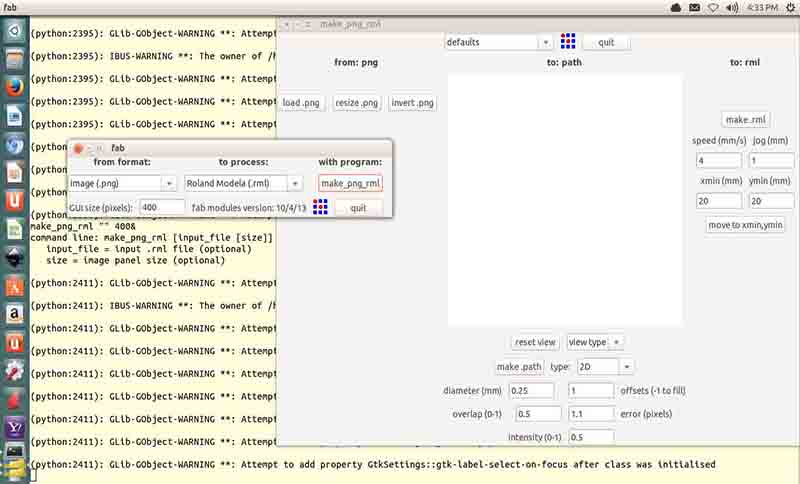
SUDO FAB
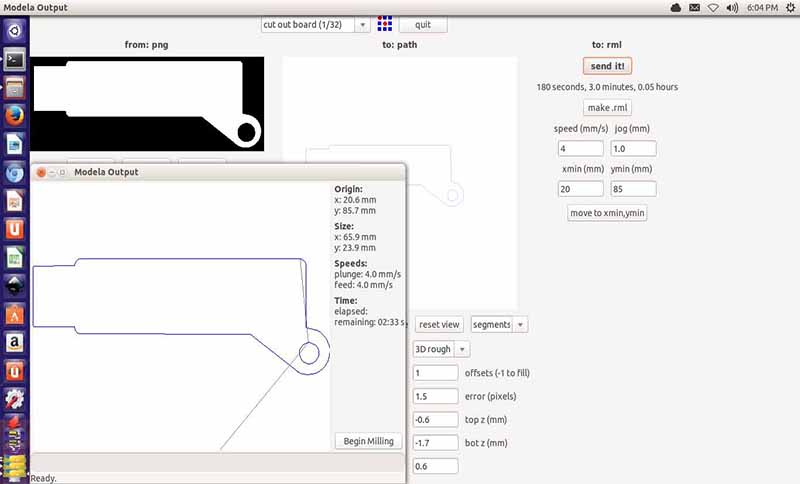
ROLAND MODELA AS .RML
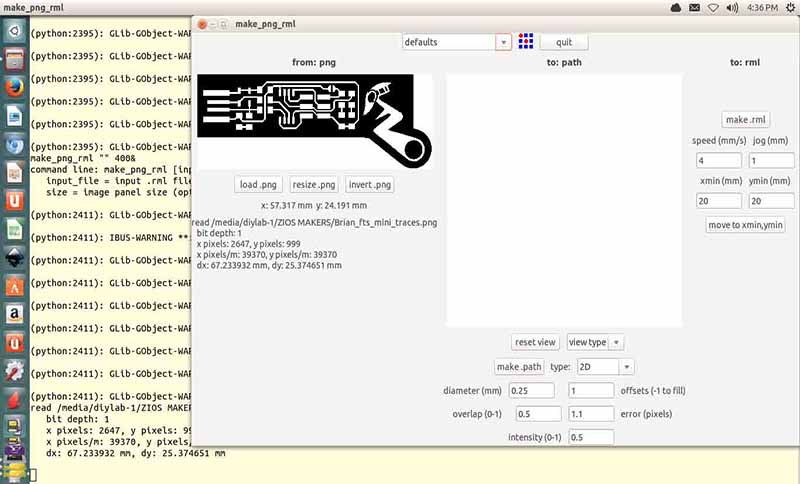
SUDO FAB
LOADING MY PNG FILE

SUDO FAB
SETTING OFFSET TO -1
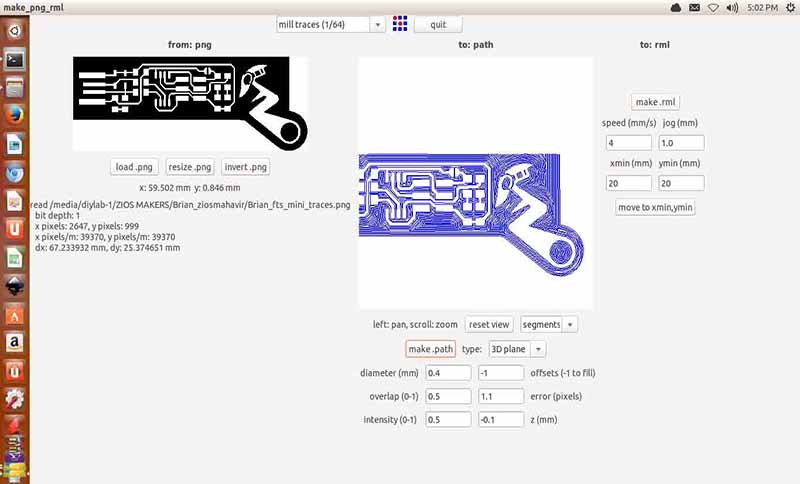
SUDO FAB
MAKE PATH ON 1/64 BIT
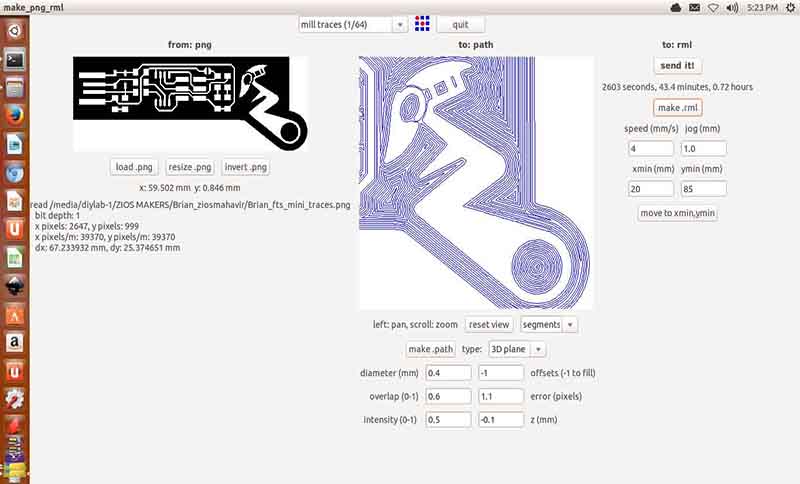
SUDO FAB
0.5 OVERLAP WONT BE ENOUGH
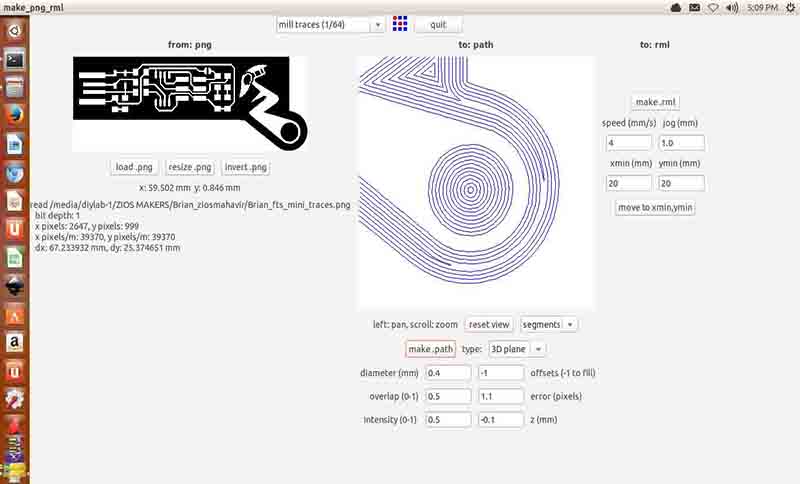
SUDO FAB
CONFIRMED ON ZOOMING IN
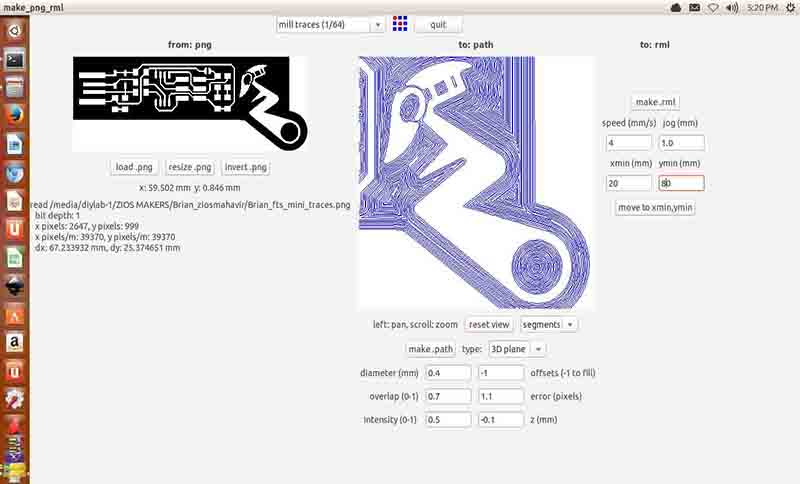
SUDO FAB
0.7 OVERLAP WILL GIVE RESULTS
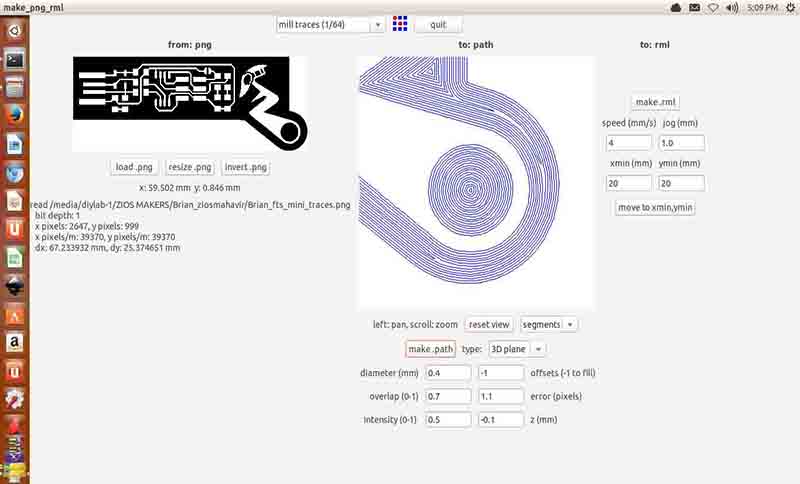
SUDO FAB
CONFIRMED ON ZOOMING IN

SUDO FAB
LOADING CUT PNG

SUDO FAB
SELECTING 1/32 BIT
SUDO FAB
CONFIRMED PARAMETERS
<-- Day 23
Day 24
[ Fun moments with Modela]
Day 25 -->
Today is Saturday :
1. Had fun with the modela's broken cover with tape on its sensor
2. No blower to blow the dust off. Blowing with my mouth making sure not to inhale it back
3. Perfect milling of my board after few trials and understanding.
1. Had fun with the modela's broken cover with tape on its sensor
2. No blower to blow the dust off. Blowing with my mouth making sure not to inhale it back
3. Perfect milling of my board after few trials and understanding.
 Today, its Vigyan Ashram's holiday as its their Village yatra (journey) where all the people belonging to that village meet each other coming from different places, pray as community and invite others to their home for lunch and dinner. So I was invited to one of our instructors place which had a very beautiful and heritage architecture, ate very tradional Vegetarian food. On this occasion they also have faire as community.
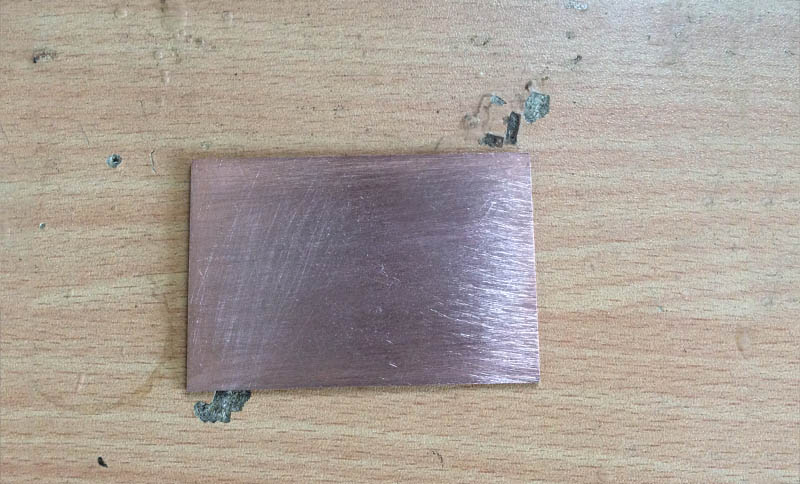
PCB MILLING
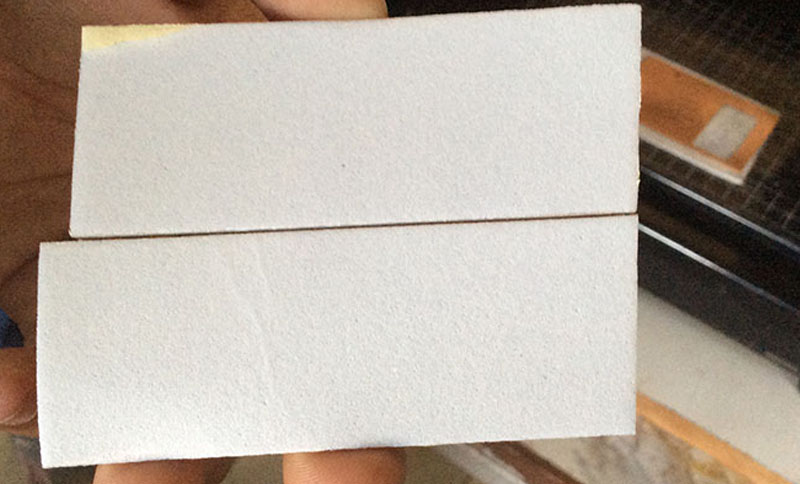
RUBBED COPPER PLATE WITH SAND PAPER
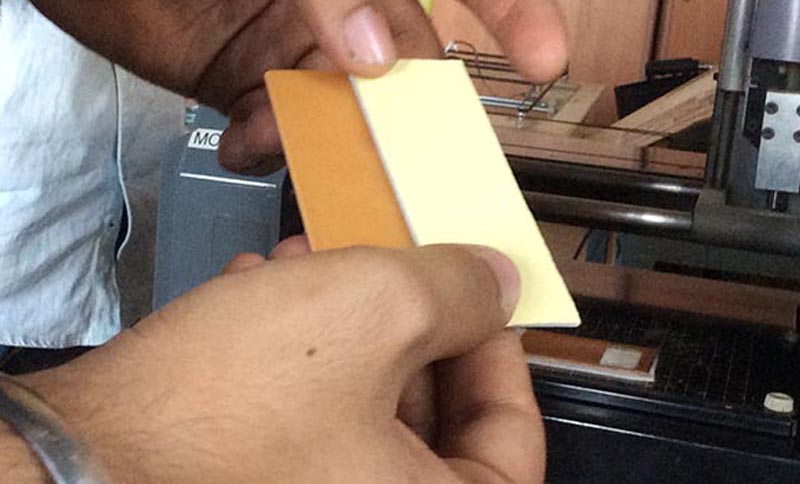
PCB MILLING
APPLIED DOUBLE SIDED TAPE

PCB MILLING
ALIGNED TAPE
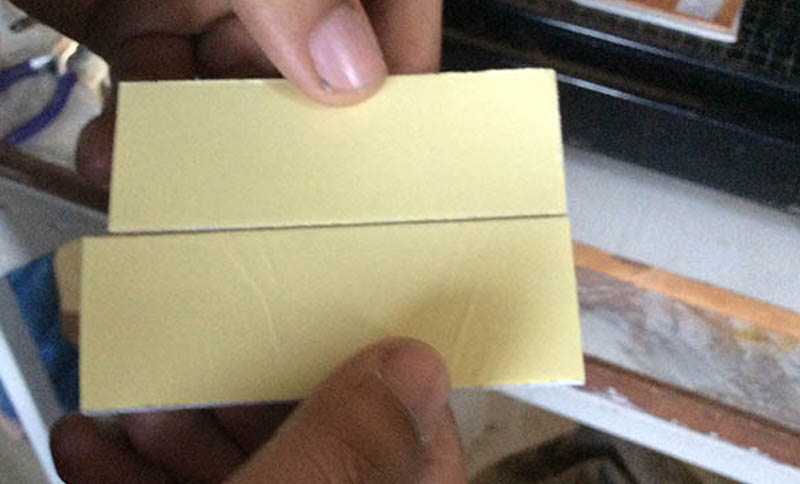
PCB MILLING
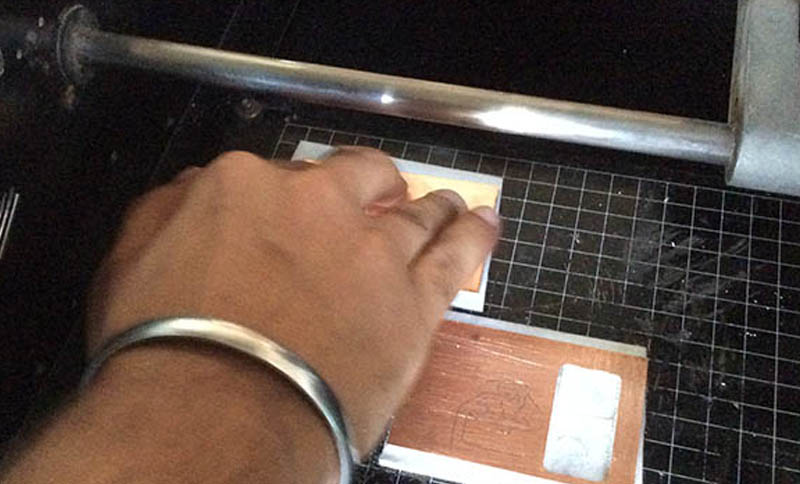
READY TO SECURE ON BED
PCB MILLING
PEELED OFF THE LAMINATE
PCB MILLING
PLATE SECURED ON BED

PCB MILLING
BROUGHT BIT CLOSE TO BOARD
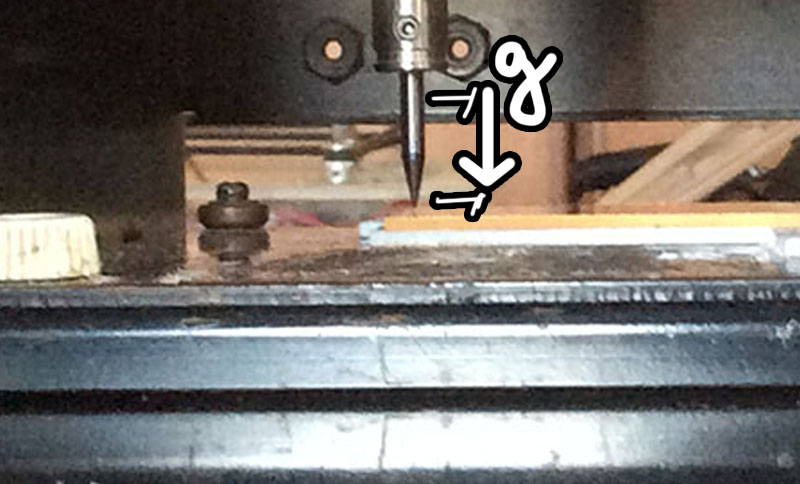
PCB MILLING
LET GRAVITY MAKE THE FINAL ADJUSTMENTS

PCB MILLING
HAPPY MOMENT

PCB MILLING
DRILLED HOLE INTO THE PCB
PCB MILLING
STARTED SECURING MY COMPONENTS
PCB MILLING
NOT SATISFIED WITH HOLE-REDRILLED
<-- Day 24
Day 25
[ Stuffing the Board ]
Day 26 -->
 Today, its Vigyan Ashram's holiday as its their Village yatra (journey) where all the people belonging to that village meet each other coming from different places, pray as community and invite others to their home for lunch and dinner. So I was invited to one of our instructors place which had a very beautiful and heritage architecture, ate very tradional Vegetarian food. On this occasion they also have faire as community.
- 1.Gathered all components
2. learnt how to stuff it and solder
3. Learnt importance of Flux and how to add and remove solder
4. Loved arranging the components while soldering
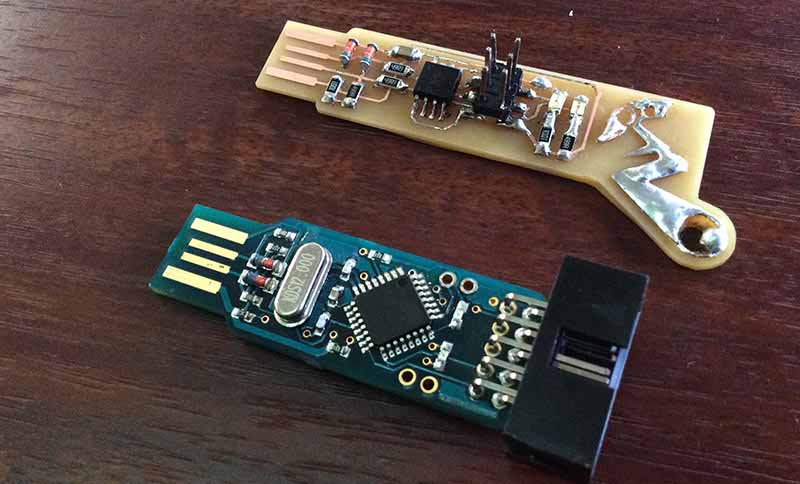
SOLDER TIME
SOLDERED IC FIRST-CHECKED CONTINUITY
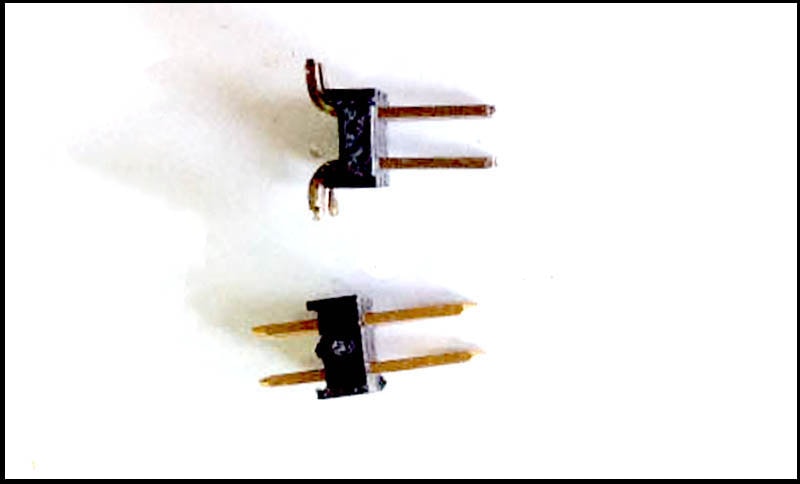
SOLDER TIME
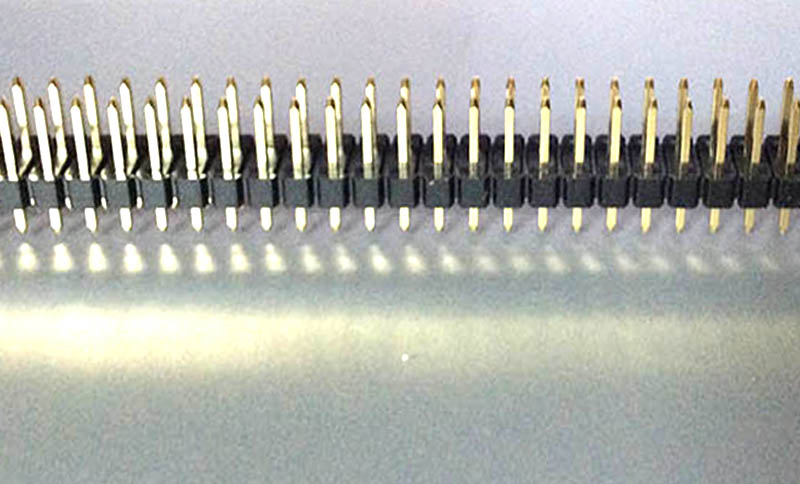
ADJUSTED HEADER PINS FOR SOLDERING
<-- Day 25
Day 26
[Programming time]
Day 27 -->
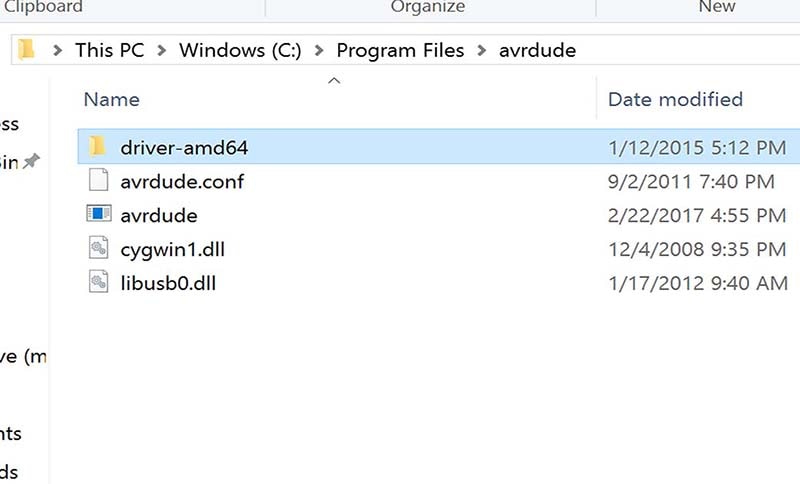
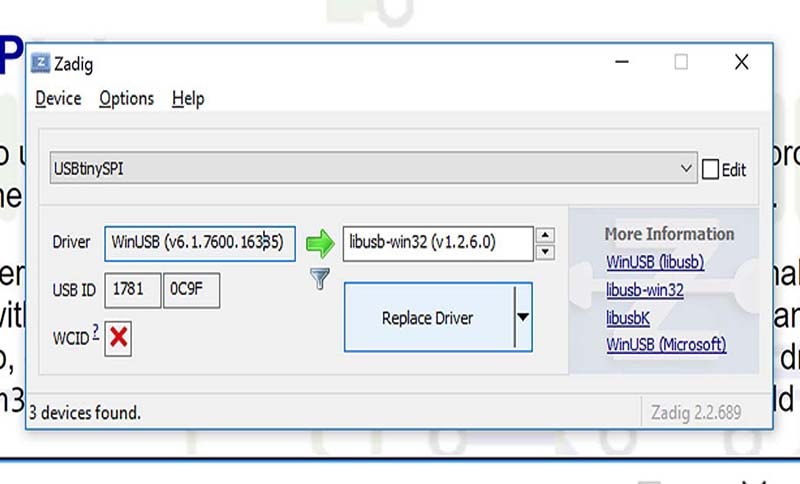
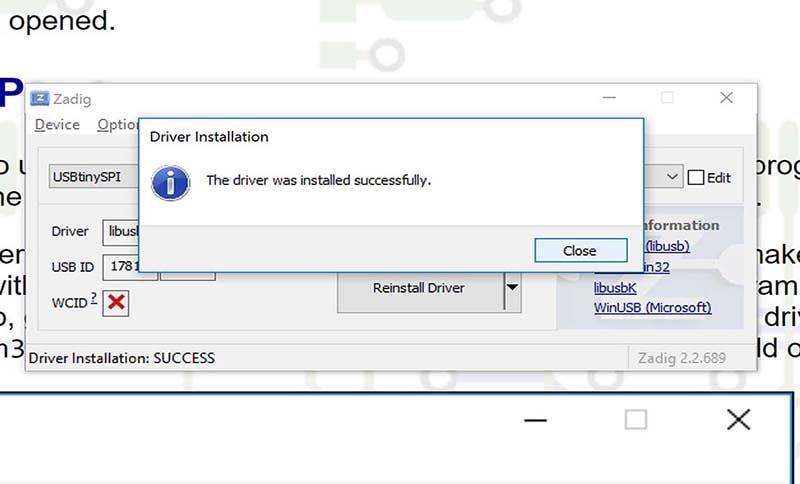
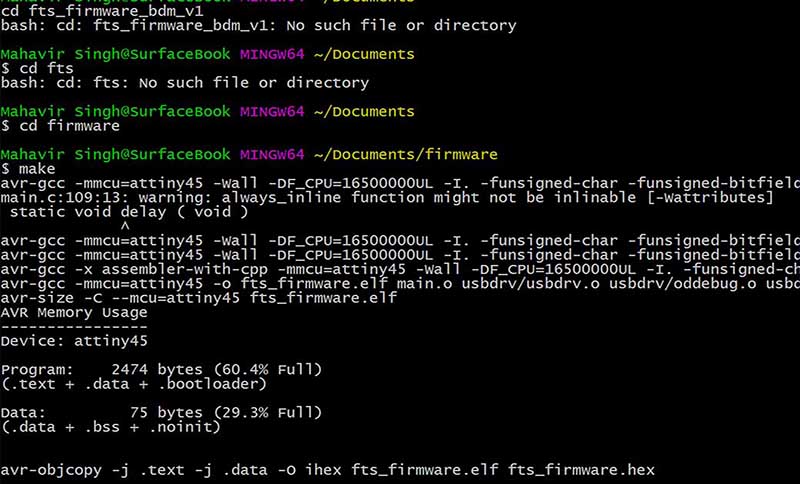
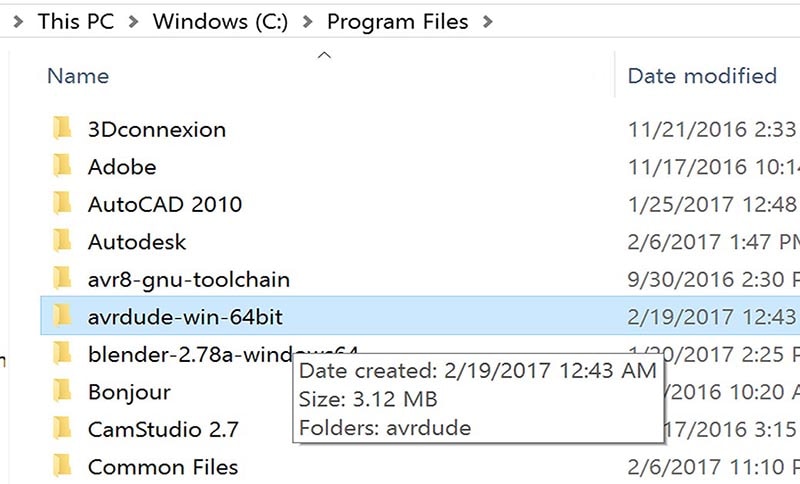
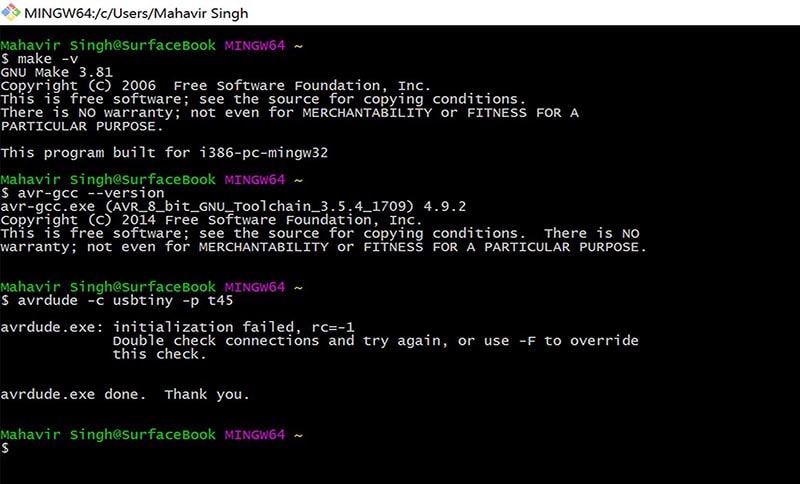
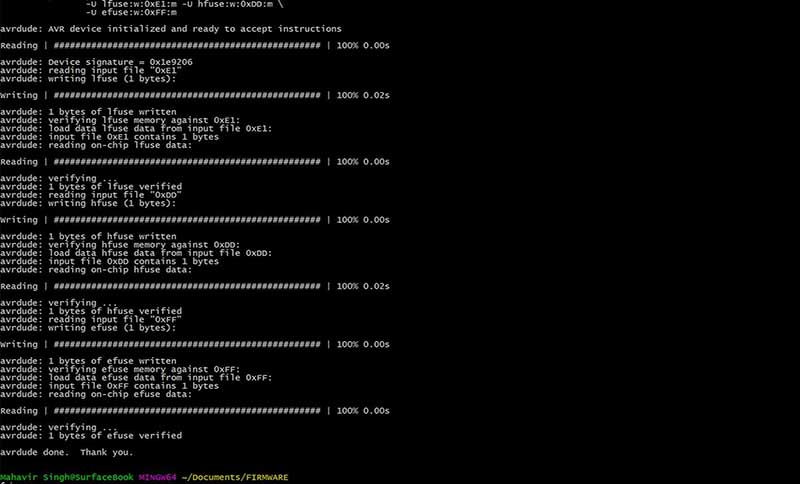
- Made it a point to try programming with windows as its mentioned in Brian's tutorial - Got lots of errors every step but figured it out slowly. - Installed softwares mentioned in Brian's tutorial
I liked this week as it forced me to not sit on laptop whole day designing and working but also do hands on work . I discussed with Yogesh ji my final project and how i plan to improvise it with time and use Shopbot before the given week so that i am able to figure out ideas to improve my final project. Nishtha made few designs which can be used for folding in group assignment as reference for all of us for our projects, so using 2 from that and designing 3-4 of mine i laser cut all of them and analysed which one go well easily for my Maker turban.
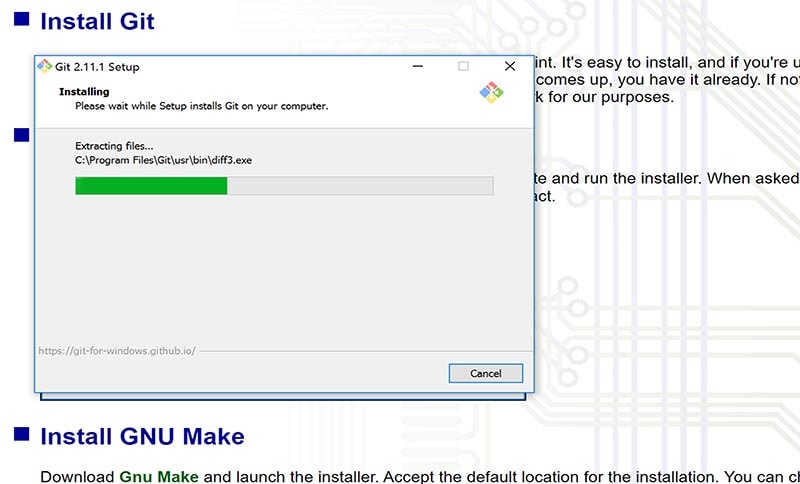
STEP 1
INSTALLED GIT
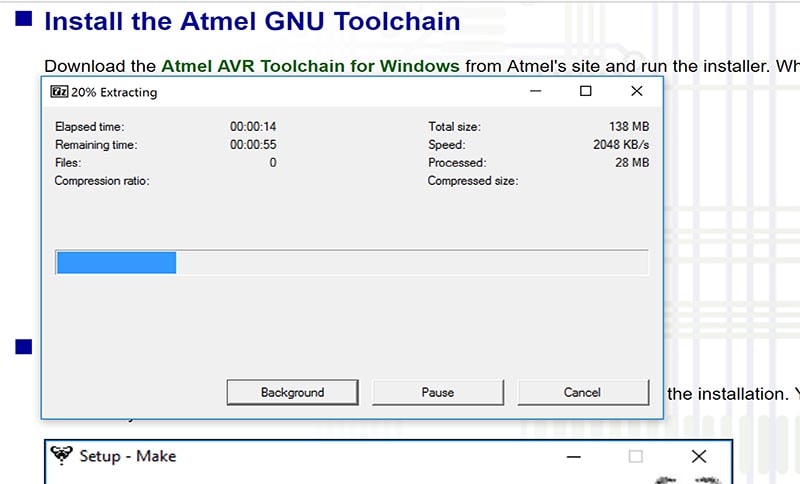
STEP 2
INSTALLED ATMEL GNU TOOLCHAIN
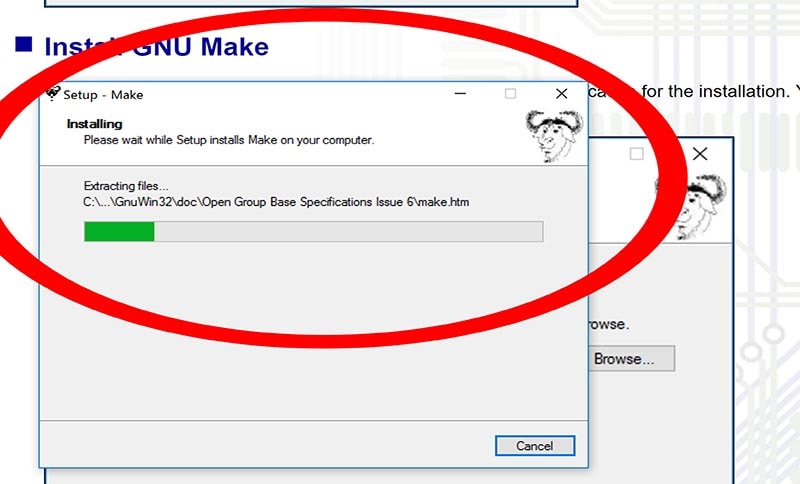
STEP 3
INSTALLED GNU MAKE

STEP 4
INSTALLED ATMEL STUDIO
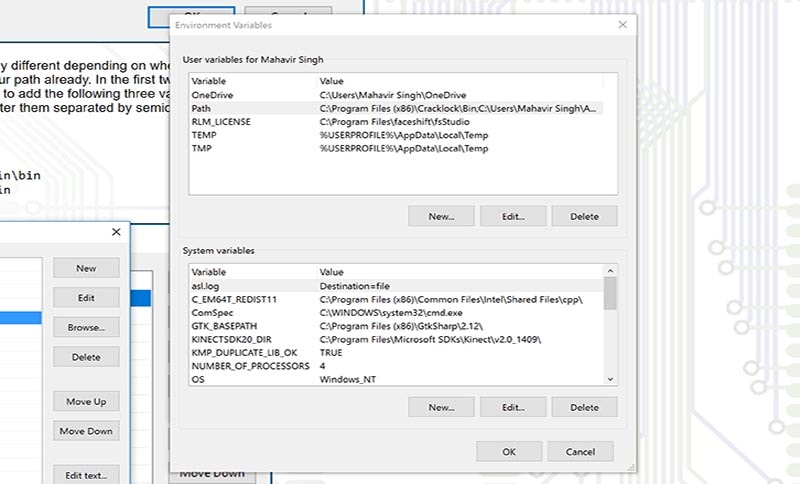
STEP 5
ACCESSED ENVIRONMENT VARIABLE
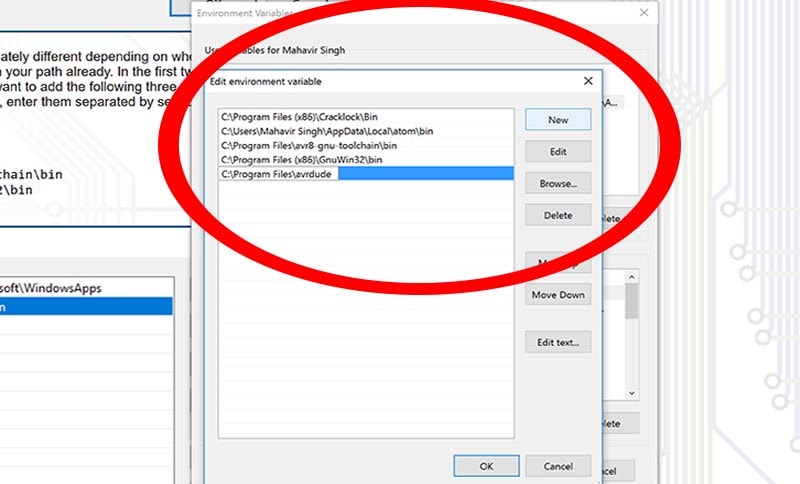
STEP 6
SET PATH IN ENVIRONMENT VARIABLE
<-- Day 26
Day 27
[Giving Windows a try]
Day 28 -->

I liked this week as it forced me to not sit on laptop whole day designing and working but also do hands on work . I discussed with Yogesh ji my final project and how i plan to improvise it with time and use Shopbot before the given week so that i am able to figure out ideas to improve my final project. Nishtha made few designs which can be used for folding in group assignment as reference for all of us for our projects, so using 2 from that and designing 3-4 of mine i laser cut all of them and analysed which one go well easily for my Maker turban.

Step 1
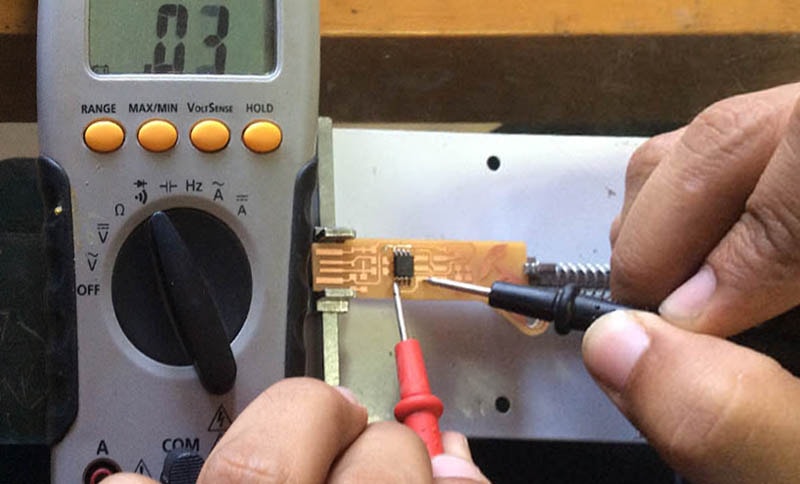
Trying a consumer programmer
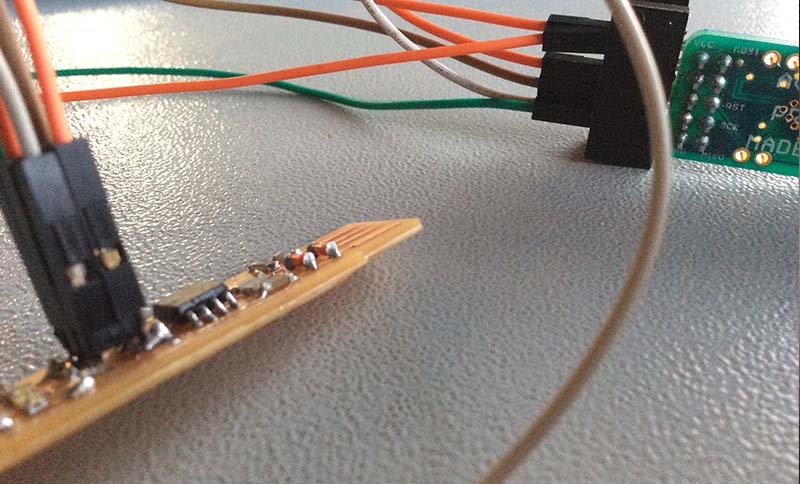
Step 2
Understanding how to connect boards

Step 3
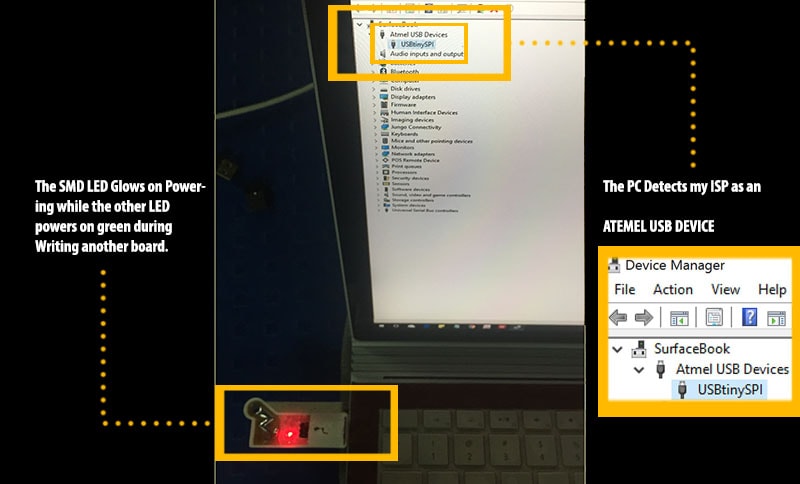
It lit up
<-- Day 27
Day 28
[ Thinking to try with UBUNTU]
Week 5 -->

I liked this week as it forced me to not sit on laptop whole day designing and working but also do hands on work . I discussed with Yogesh ji my final project and how i plan to improvise it with time and use Shopbot before the given week so that i am able to figure out ideas to improve my final project. Nishtha made few designs which can be used for folding in group assignment as reference for all of us for our projects, so using 2 from that and designing 3-4 of mine i laser cut all of them and analysed which one go well easily for my Maker turban.
STEP 1
WEEK 4

STEP 2
WEEK 4
STEP 3
WEEK 4
STEP 4
WEEK 4
STEP 5
WEEK 4

STEP 6
WEEK 4
STEP 7
WEEK 4
STEP 8
WEEK 4
STEP 9
WEEK 4

STEP 10
WEEK 4

STEP 11
WEEK 4

STEP 12
WEEK 4

STEP 13
WEEK 4

STEP 14
WEEK 4

STEP 15
WEEK 4
STEP 16
WEEK 4

STEP 16
WEEK 4
- Get link
- X
- Other Apps


Comments
Post a Comment